Seasonal
Get Your Gas Grill Ready for Grilling Season
If you're ready to taste some great barbeque, but your grill is looking a little worse for wear this year, don't worry. You can save your old grill from ending up in the trash and restore it to new, working condition for much less than the cost of buying a new grill. With a little elbow grease and a few replacement parts, you can repair your gas grill and get it ready for use in no time. Remember to disconnect the propane tank or gas supply before your start. You may also want to wear a pair of work gloves to protect your hands from the grease and dirt stains.
Get your grill ready for summer.
Inspect It Inside and Out
Take a good look at your grill's interior and exterior. If it has extensive rust, cracks, or any other damage especially to the body, it may make more sense to buy a new grill. If the grill appears to have minor wear and tear, it may be more cost effective to refurbish it inside and out.
Gently move the grill around to check for wobble caused by loose or missing screws. Tighten or replace and missing or corroded screws or fasteners.
Remove the cooking grate and warming rack and set them aside for a thorough cleaning. Take out the lava rocks or ceramic cooking briquettes from the bottom. If the rocks are older than a year or full of greasy drippings, toss them in the garbage and replace them with fresh, new rocks or briquettes.
Test and Replace Any Worn Out Parts
Inspect the igniter and firebox. To do so, hold a mirror behind the igniter collector box while pushing the igniter button. If you can see a spark, the igniter is working. If not, the igniter assembly is worn out and should be replaced. Disconnect the igniter wire and remove the retaining clips from the venturi tubes. You can then remove the igniter collector box from the burner and the igniter button from the control panel.
Remove and check the burner and venturi tubes for cracks, holes, or wear. If either needs replacement, check your owner's manual or the manufacturer's website for the correct part number. There are also universal style burners that are made to fit multiple brands and models in case the exact replacement part is hard to find.
Examine the hoses, gas line, regulators, and propane tank. Replace them if you see evidence of cracking, corrosion. To check for leaks on the tank, spray the exterior with soapy water. If you see bubbles which indicates a leak, replace the tank.
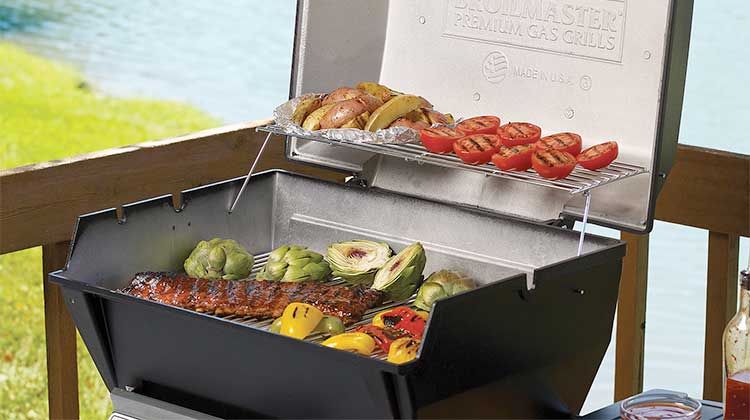
If your grates are rusted beyond repair, replace them. Minor stains and rust can be removed with a cleaning brush and a wash in soapy water. Porcelain-coated grates should be replaced if they show signs of cracking. Bare-cast grates should be cleaned and periodically oiled to prevent rust. Use a food-safe oil or a thin coating of lard to protect and season them. Also replace any knobs, handles, or other parts as needed.

Replacement parts and accessories will ensure your grill is in good working order.
Don't forget the drip pans. Remove and give them a thorough cleaning. If they are cracked and corroded, it's best to replace them. Some people try to extend their life by lining them with aluminum foil. This is not recommended, however, since the foil can hold accumulated drippings and cause a grease fire. Play it safe and replace the pans when needed.
Clean Off Grease and Grime
While dismantling your grill, take the time to clean both the exterior and interior. Grab that grill brush and scrape off any accumulated grease, dirt, and burnt-on goo from the grates and rack. Clean out the interior, especially the bottom where drippings and ash tend to deposit. Wipe off the entire grill and hood from top to bottom, inside and out to remove dust, dirt, dead insects, and any other grime. For stubborn stains, you can wash the grates and cooking rack using warm water and mild dish soap after using a wire brush to dislodge heavier build-up. Rinse them thoroughly to remove any soapy residue before drying. For the grill body, you can also use oven cleaner to help clean off any remaining hard-to-remove greasy film or use a degreaser and a power washer to blast off grease and loose paint. Rinse and let the grill dry completely in the sun.

A good grill brush will remove grease and grime from your cooking racks.
Restore the Finish
Once you have removed all traces of grease and grim from the surfaces and crevices, remove any rust residue or chipping paint with a wire brush. Sand pitted and corroded areas first with 80-grit sandpaper and then with 120-grit sandpaper. Sand the entire grill body and cart as needed. Sand any wood slats. Refinish them by staining them to restore the color and then sealing them with Danish or linseed oil.
Wipe the grill with a tack cloth to remove the dust from sanding. Apply a rust converter to the sanded metal surfaces, then spray a quality primer over the converted rust and bare metal. Once the primer is dry, spray the grill with the paint designed specifically for grills or high-temperatures. Let it dry for the recommended time. Reinstall the burners, grates, and replacement parts, and start grilling.