DIY
Kitchen Renovation Interview: Save Money, Renovate One Step at a Time
About Our Renovator: DIYer and Homeowner – MA, 55 – 64
Design inspiration, a little elbow grease, and DIY dedication help turn a dated room into dream kitchen.
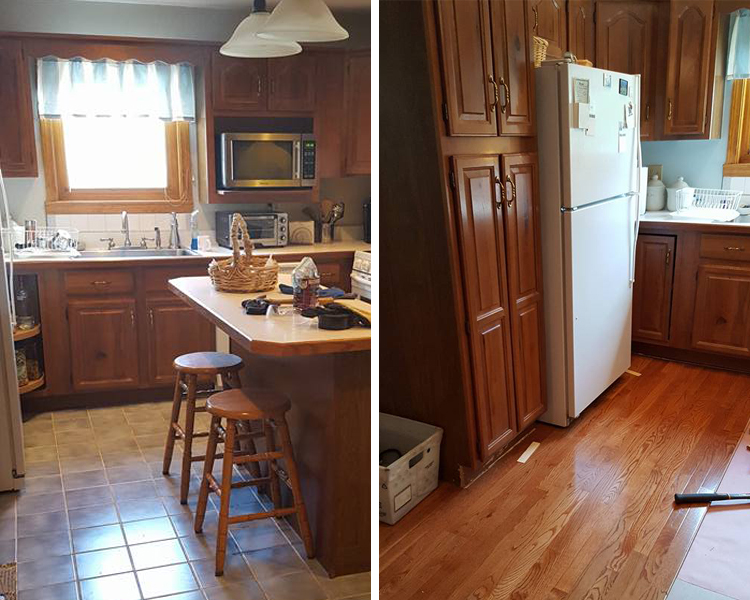
Demo of the dated circa 1989 kitchen begins.
What factors led up to your renovation(s)?
Our kitchen was pretty much the same as when we bought the house 20 years ago with the exception of changing the light fixture, faucet, and wall color shortly after we moved in. Although I had always planned on renovating the kitchen, the project was low priority on the long list of updates and renovations. The kitchen was functional and had been remodeled five years prior to our purchasing the house. However, let’s just say early 90s dark-stained cabinets, white Formica countertops, and a blue ceramic tile floor were not my style. Now that most of the rest of the house had been remodeled, it was time for my dated kitchen to go.
How did you start planning and preparing for your renovation?
I always had a rough idea of how I wanted my kitchen to eventually look from the day we closed on the house. To save money, we chose to keep the existing circa 1989 stock cabinets which were solid hardwood, a style that suited the architecture of the house, and in good condition.
I decided to give them a makeover with trim molding, fresh paint, and new hardware. Since I hated the floors and countertops, we planned on replacing them entirely, along with adding a new subway tile backsplash to replace an outdated tile one that had been installed only behind the sink and stove. At the same time, we painted all the wood trim and doors in the house over the dated stained finish and refreshed the paint on the ceiling and walls.
To give the small kitchen a more open look, we decided to replace the tile floor with hardwood to make it more cohesive with the hardwood in the surrounding rooms. Because the kitchen floor now blended visually with the other rooms, it made the kitchen appear larger. We chose quartz for the countertop due to its looks, easy-maintenance, and durability.

A new quartz counter replaces a Formica one, and a new subway tile backsplash is installed.
Since our kitchen is located at the center of the first floor with the living room, dining room, family room, and home office connecting to it, it tends to feel dark and claustrophobic even though light filters in all the doorways and windows in the surrounding rooms.
To lighten and brighten it, we opted for a color scheme with white cabinets, white subway tile backsplash, white quartz with light gray marble-style veining on the countertops, and a light blue paint on the walls. This did wonders for brightening the space which has a U-shaped cabinet and counter configuration. We also changed out the old drop-in sink and two-handled faucet for a new Blanco undermount single-bowl sink and a single-handle American Standard Portsmouth faucet. At the same time, our old garbage disposal died, so we also added a new, quieter, and more corrosion-resistant Insinkerator 333 model.
Did you hire any outside help or did you renovate yourself? If you hired help, how did you choose?
To save money, we did most of the work ourselves. We did the demo on the tile floor and existing backsplash. We painted the ceiling, walls, wood trim throughout the room. We added the molding trim on the cabinets to give them a semi-custom look, painted them, and added the new hardware. We also installed the new faucet, a new garbage disposal, a new dishwasher, and a freestanding kitchen island in place of the old, narrow one that had to be bolted to the floor.
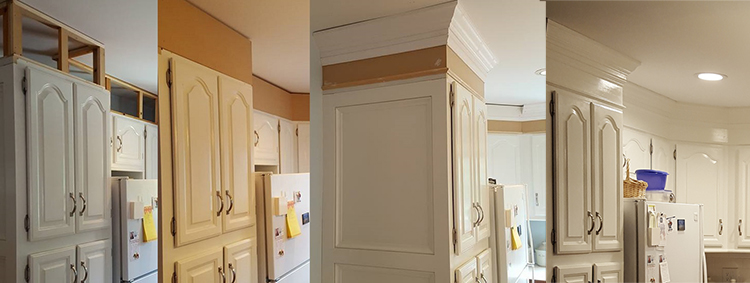
We closed the gap above the cabinets for easy cleaning and a more customized look.
We hired contractors to do the work we did not have the skills, tools, or experience to do ourselves including the quartz countertop install and the backsplash. We also hired a carpenter to do the final crown molding above the cabinets, because it saved us the aggravation of trial and error of doing it ourselves.
How did you go about setting a budget, and did you go over it?
We tend not to set budgets in the usual sense because we tend to do larger projects in smaller increments that won’t bust the budget or make us use loans to pay for it. We wanted to keep the entire cost under $12,000 which is why we did most of the work ourselves. Our largest expenditures were the countertops, flooring, and backsplash. We still plan to replace the refrigerator and stove with stainless steel models in the very near future. Some unplanned emergency home repairs not related to this renovation project came up during the remodeling period, so our appliance budget went to a replacement front door instead.
What was the biggest unforeseen renovation obstacle?
When we removed the old tile floor and the plywood footing to get the kitchen floor at the correct level with the hardwood floors in surrounding rooms, we discovered some of the wood planks making up the subfloor had dry rot issues. We had to replace these before installing the hardwood floor. These planks were also cut on a 45-degree angle (which helps prevent warping), so cutting and fitting new ones was a bit more time consuming. It was also tricky securing the last rows of flooring as we had to work around existing cabinet footing instead of having a fully gutted room to use as a blank slate. We got creative since we couldn’t fit the nail gun into some of these tight spaces, but we found a way that worked well.
What were your best go-to resources when you got stuck?
I subscribe to a magazine for owners of older homes and renovators that is full of tips and tricks for DIYers. I also got my design inspiration from Pinterest, home design and style blogs, photos of kitchens I liked, etc. We didn’t run into too many issues where we got “stuck” so much as we got tired of the demo/renovation mess and chaos. Since we only worked on the project on weekends and on some weeknights after work, it was a longer process than if we hired everything out. Renovation projects are always disruptive and messy and draining both physically and mentally. To get through it, you just have to focus on the endgame, knowing the finished project will be well worth the time, effort, and money spent.
What was the most interesting skill/thing you learned during the experience?
Prior to this renovation, I had never done any specialty trim molding on cabinetry. I learned how to use my husband’s miter saw and taught myself how to cut and add all the trim. I added molding along the top and bottom of the cabinets, installed decorative feet, and created recessed panels on the exposed sides of the cabinets near the sink, pass-through opening, and on the floor-to-ceiling pantry-style cabinets. I also discovered doing demo on tile floors with a hammer is a great stress reliever.
If you could go back and give your pre-renovation self some advice, what would it be?
If I had to do anything over, I would have invested in a power paint sprayer rather than paint the cabinets by hand using a brush. It was more time consuming and harder to get a smooth finish. On the plus side, I was able to do the cabinets in sections rather than all at once, didn’t need to fully empty them to paint, and I didn’t need to tape off and cover as much of my kitchen as I would if I had used a sprayer.
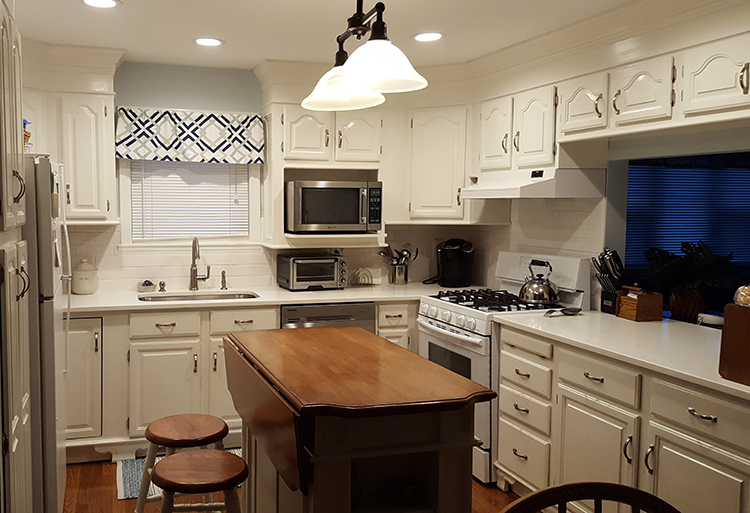
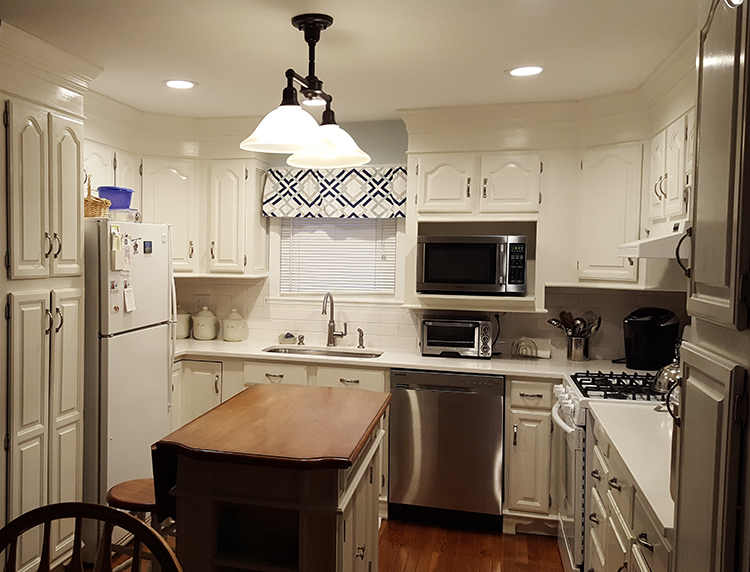
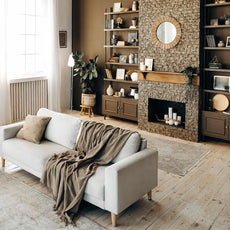
The completed kitchen is lighter and brighter.
Any other thoughts to add?
My advice to anyone planning a DIY project is to be prepared to live with some mess during the renovation. Don’t be afraid to make mistakes. They are learning opportunities and anything can be redone if necessary. Allow for budget overrides and be prepared to go with the flow when something gets delayed or plans need to be altered. All that matters is that you’re happy with the final result.